Back in March, the entire second year of the Academy’s Live Event Production course were assessed together across all disciplines. Tasked to put their fledgling talents to the test by collaborating on a video, lighting, and audio production with a live band.
Although my (wall of) sound mixing skills were later channelled for indie-rockers Tummyache, it was the Visual Design for York-based melodic Metal band Theseus and their song “As Above So Below” that captured my imagination. Taken from their debut album ‘It’s Never Too Broken’, this song inspired the exploration of esoteric themes without alienating myself too far from my peers.
The song itself delivers three minutes of unapologetic fury, but the production demanded weeks of design and implementation graft before we brought it all together on the day.
Here’s how it was done.
Concept
The title “As Above So Below” was sufficient to draw my esoteric interest, hearkening back to Hermeticism, but the lyrics themselves revealed more of a political slant. Expressing the frustration of systemic inequity against the crumbling symbols of authority.
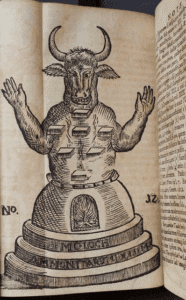
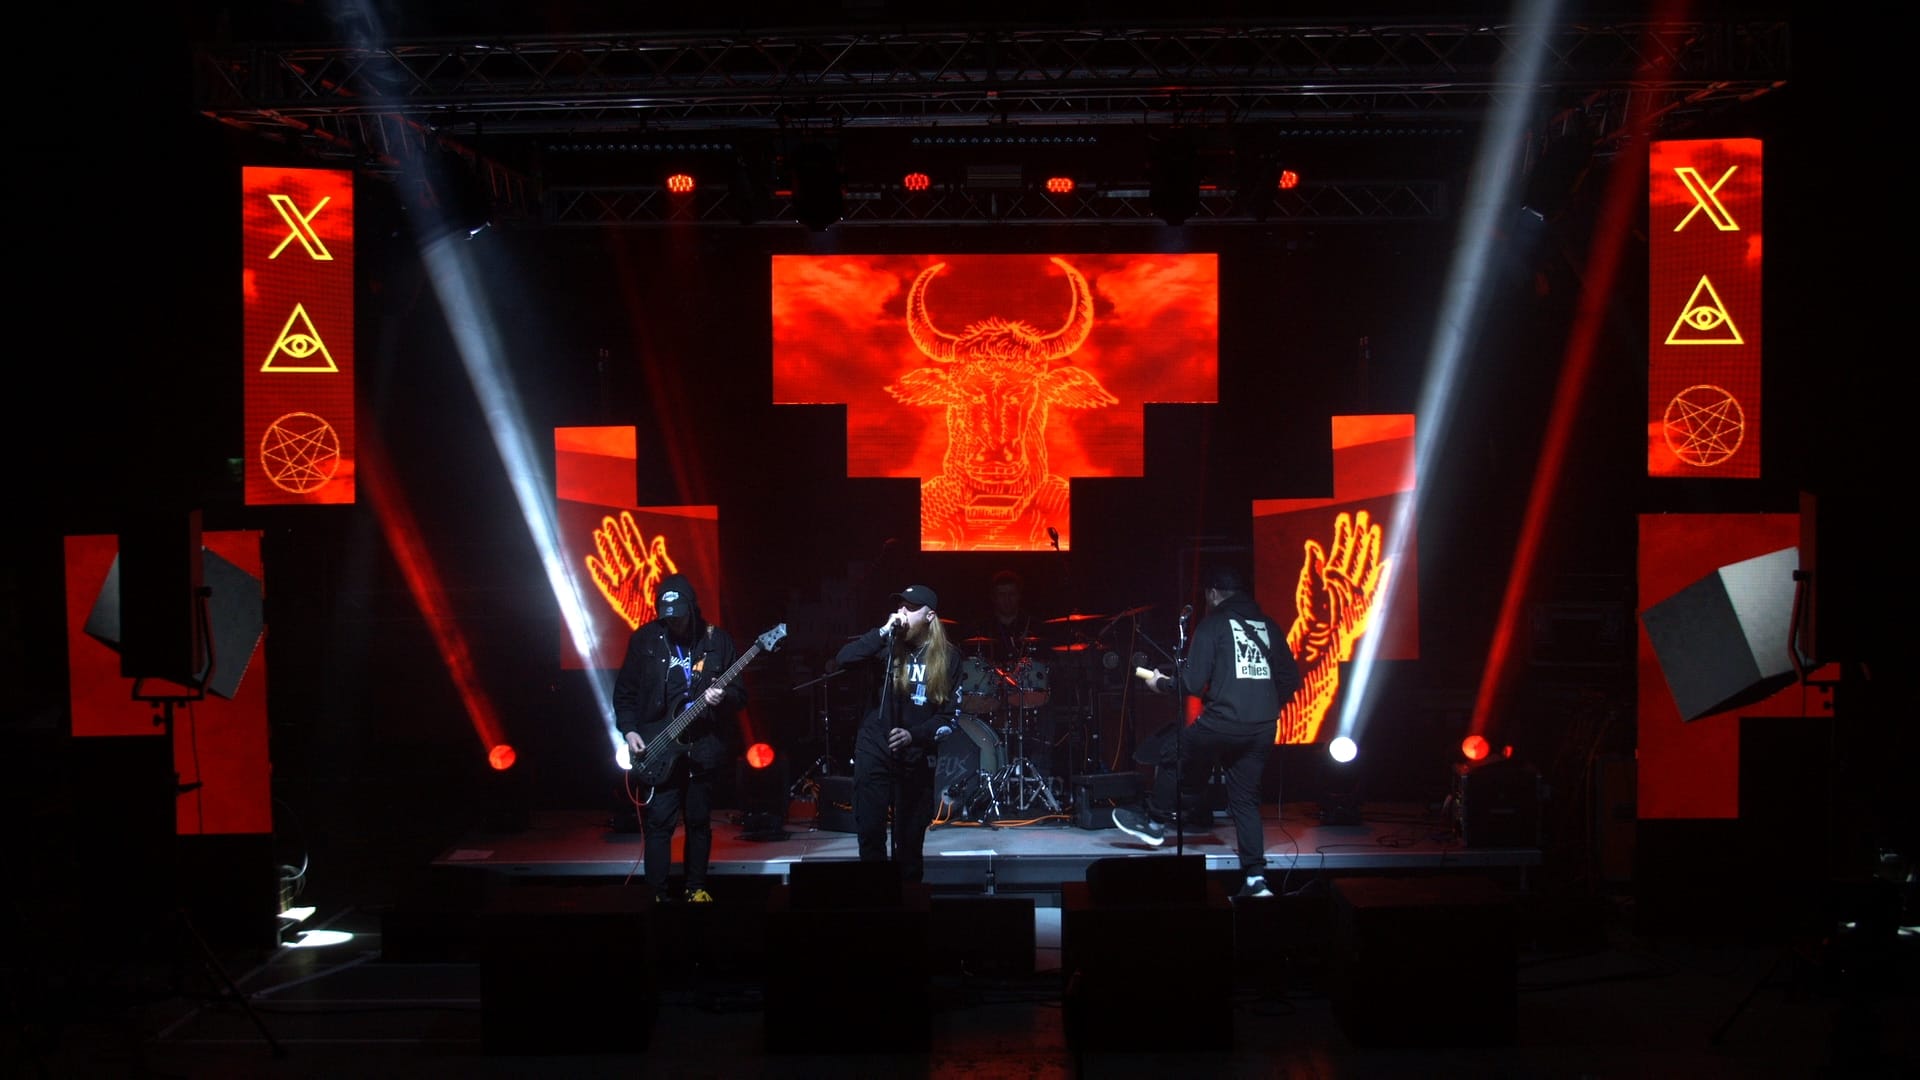
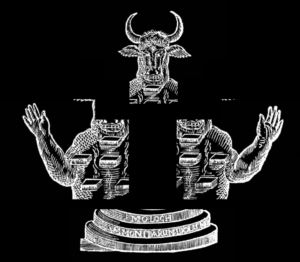
Combining both, I looked towards current headlines and sought a way to explore and invoke this imposed asymmetry within a magickal visual framework. The Canaanite idol, Moloch, immediately came to mind as the perfect archetype to work with.
A “horrid king besmeared with blood”, to paraphrase Milton, Moloch represents a symbolic “devouring god” in many historical interpretations. Embodying the sacrifice of innocents consumed in offering to oppression, and later reinterpreted to encompass the demanding, industrialised power of a corrupt state.
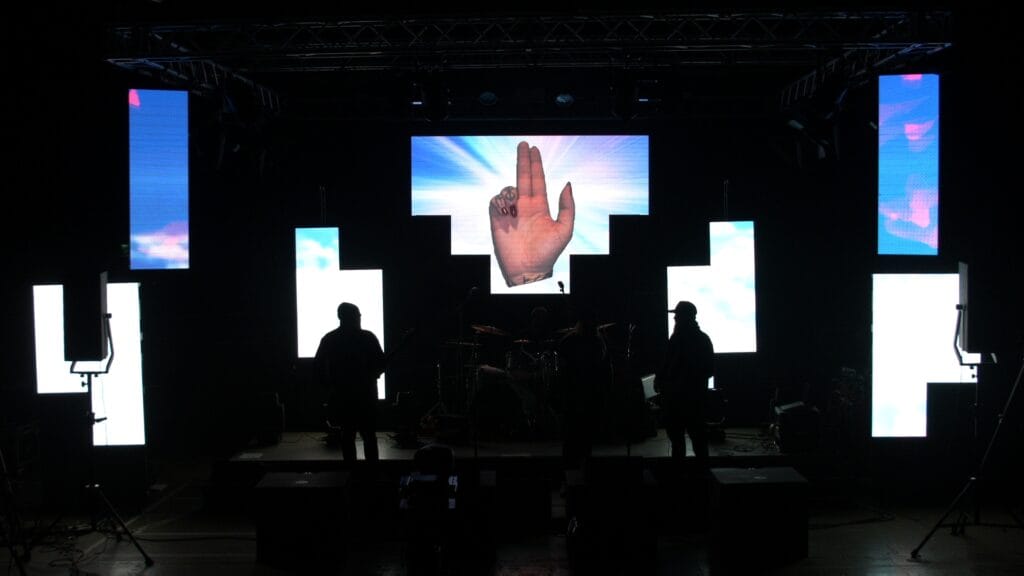
Visually, there were two conflicting aspects to represent; ‘Above’ and ‘Below’, corresponding to the two halves of the song.
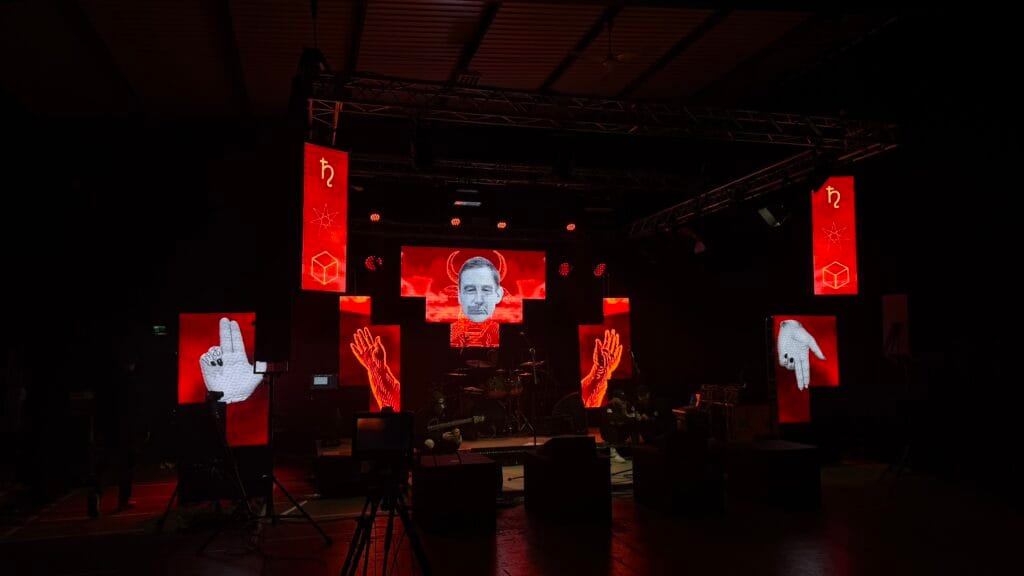
‘Below’ would form Moloch’s domain. A demonic tunnel of crimson clouds rushing towards the audience. Drawing eyes inwards towards the looming bull-headed face above the stage, with arms reaching out over unyielding fire.
Falling from the clouds are a cascade of shifting symbols, visible and blatant. The “signs they show”. Classically occult iconography juxtaposed with logos of modern surveillance capitalism. Implying that both have been, and are, the engines of exploitation.
Black Saturnian cubes spin within the clouds to reflect the churning prison matrix of authoritarian control. Becoming ever more erratic as the song progresses to the “Virtuous Portal” of the lyrics, and Below shifts to Above.
The soaring solo at the end of the song leads us into ‘Above’. Breaking through the dark clouds and rising into blue skies. The final ashes of Moloch’s domain transmute into petals in renewal and fall as the song finishes, with a sunburst filling the stage with white.
From Schematic to Stage
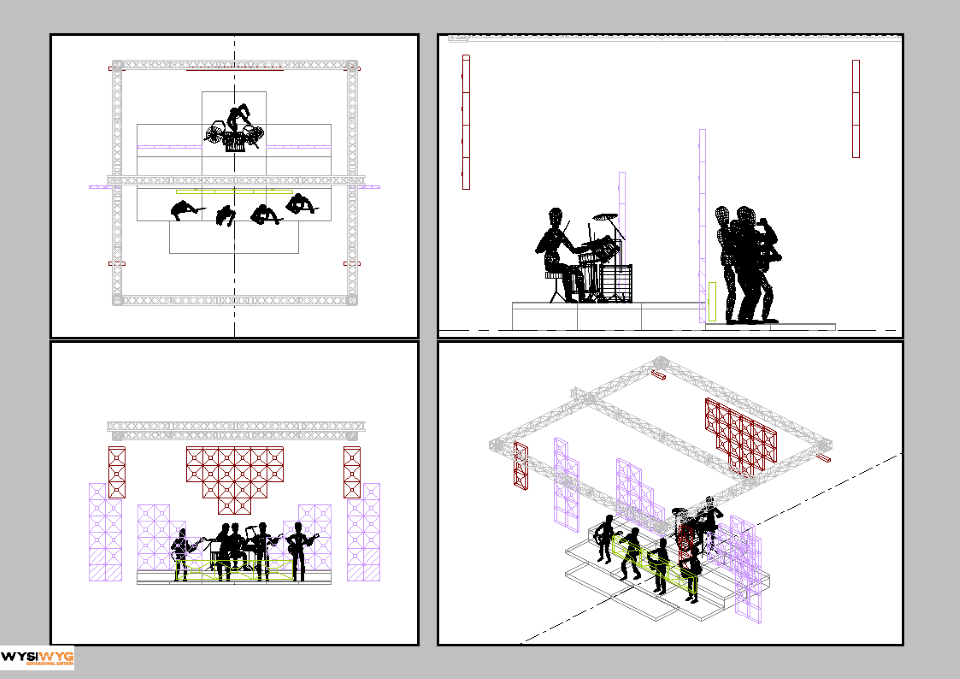
The first challenge was to design a video panel layout that would work for all members of the visuals group. The fixed panels on the truss provided a structural base to work around and guide the rest of the design. Underneath, I proposed a set of four ground stacks: two either side of the drummer, and two further outwards on the studio floor, raised with dummy panels for visibility. These formed a concave, staggered arc to match the flow of the fixed panels and subtly pull focus towards centre stage.
The final touch would be a strip of horizontally-stacked panels across the stage ‘step’, centred in front of the drummer. Offering a visual anchor that breaks up the verticality of the rest of the stacks. The combination of these different shapes would offer a wide, dynamic canvas for everyone to apply their creative flair.

The fixed, flown layout consists of three sets of Prolights Alphapix panels, driven by a NovaStar media processor, with the rear set providing a large canvas for the main content. Two three-panel columns at the front of the truss were an ideal location to display the shifting symbols of the concept.
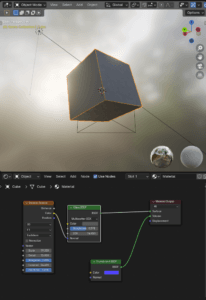
The ground stacks use ROE Black Pearl BP2 panels at 176 pixels square, driven by a Brompton Tessera S8 media processor. The inner stacks were reserved for Moloch’s static presence, particularly the arms framing the centre of the stage, while the outer stacks carried more dynamic motion content. The spinning cube was simply designed, textured, and animated in Blender, and mirrored across both these stacks to reinforce symmetry.
The horizontal centre-stage strip uses ROE Carbon CB5 panels at 208 by 104 pixels, driven by a Colorlight Z6 media processor. The lower resolution would be countered by the brightness of these particular panels, shining behind the performers.
Building the Canvas
To manage these fragmented panel zones, a unified working canvas was essential, offering a consistent guide for both myself and the rest of the visuals group. As each model of panel has a different pixel pitch, the canvas was designed to physical dimensions as a spatial block rather than a pixel target. Allowing different panel types to exist in a single compositing environment without constantly translating between resolutions.

To that end I put together a master template showing the overall layout of each panel zone, allowing ample space between each to emulate the physical distance between. This base canvas would be in UltraHD 4K resolution – 3840×2160 pixels. The template standardises half a metre to the pixel resolution of the BP2 panels, scaling up the AlphaPix and CB5s to match.
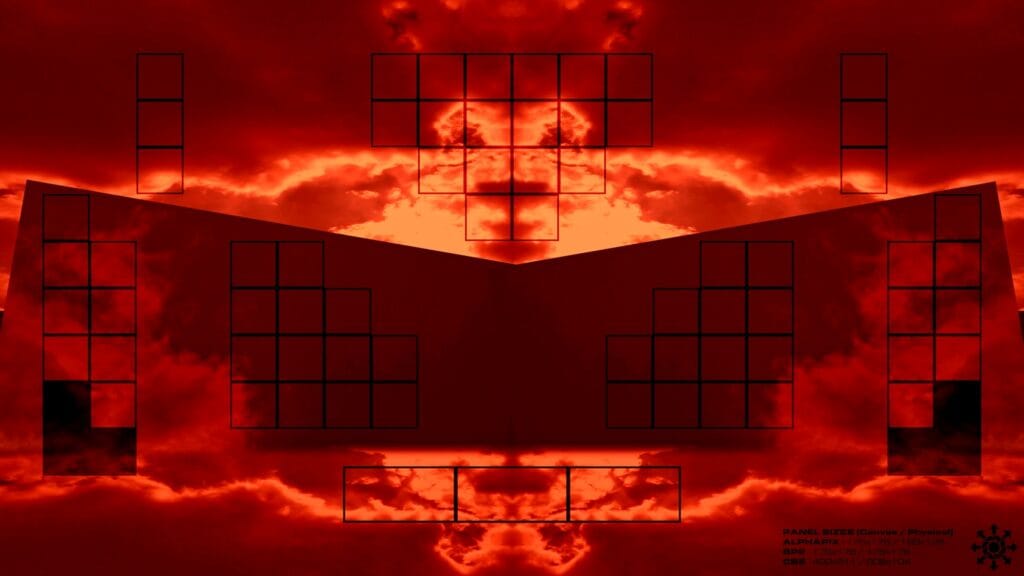
This template proved invaluable for composition, as overlaying a matching grid layer on the canvas reveals where each element would appear. For the sake of the cloud tunnel, I created a single continuous motion layer, combining both vertical and horizontal movement spanning multiple panel zones. This required intentional distortion of perspective so movement remained coherent as it passed between the separate surfaces. The extra canvas space ensuring motion didn’t collapse or bunch up between zones.
Where elements were to be spread across multiple panel sets, a bit of creative cutting was required to ensure each slice appeared where it should. Keeping such related pieces in a single image helps with file management and synchronised display, even if the unseen overlap looks a bit messy.
After prototyping at home and in the campus labs, the design was finally deployed onto a Green Hippo Amba+ server at Front of House. From there, the 4K output viewport was subsequently split into four FullHD 1920×1080 feeds to route to the media processors located by the stage.

With the canvas containing a lot of negative space, sending a the full 4K to the processors would be a waste of bandwith. Instead, the viewport was remapped, reducing content to a single FullHD feed shared between processors. It is at this point the AlphaPix and CB5 panels were resized to their original resolutions.
The NovaStar processor had already been configured to expect the AlphaPix data in the top left of this feed, so that grid was straightforward enough to map. The Brompton Tessera S8 was configured to expect data from the bottom right of the same feed, and the Colorlight Z6 from the bottom left. Using fixed corners as reference origins meant every panel type could be aligned predictably within its own interface, with subsequent panels snapping into place.
As the final signal routing would not be delivered until the evening before the assessment, I had to make the remapping as resilient and flexible as possible. Implementing my own numbering and colouring scheme, once the processed output appeared on screen I could drag each of the panel mappings into place without ambiguity. This made last-minute adjustments significantly more stable under pressure, even as the rest of the setup continued to shift.
Rogues Gallery
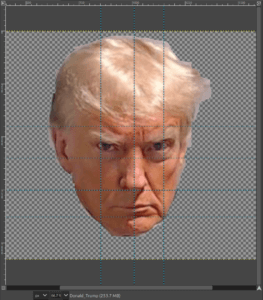
For the contemporary face of Moloch, I conceived an ever shifting photofit of billionaires, tech moguls, disgraced celebrities, and politicians of all denominations. Taking inspiration from fellow Gemini Donald Trump‘s infamous mugshot, I layered up multiple faces in GIMP with guidelines to ensure consistency of proportion and position. Framing everything in the standard FullHD resolution for consistency.
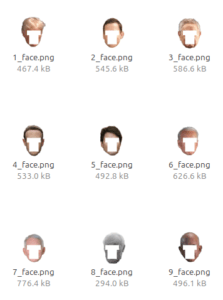
Then, I used a bit of (Image)Magick to script the conversion process. First I would extract the layers as individual .png files; then cut out rectangles approximating the eyes, nose, and mouth into separate files. All of these were also framed at the same resolution, so they could be layered atop each other in any order.
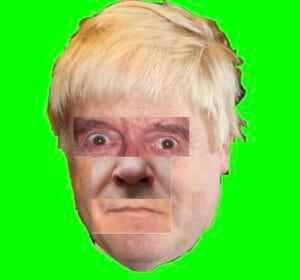
Finally, I brought all these files together in DaVinci Resolve, creating a timeline that switched the components around in quick succession, while outputting the grotesque end result with a chroma-key background. This would then be imported into Green Hippo as an Alpha mask, with additional Halftone to unify any mismatches with a grubby newsprint look.
By doing it this way, I could fix any composition glitches by tweaking the original GIMP file then re-running the scripts to bring everything back into the workflow.
exportLayers.sh
(Extracts GIMP layers into separate .png files)
#!/usr/bin/env bash

for i in {1..24}; do
  echo "Processing ${i} of 24"
  convert basemugshots.xcf["${i}"] "./ProcessedShots/${i}.png"
done
cutouts.sh
(Cuts out the eyes, nose, and mouth of each processed shot, saving to separate directories.)
#!/usr/bin/env bash

# Loop through all PNG mugshots
for f in ./ProcessedShots/*.png; do
  filename=$(basename "$f")
  filename="${filename%.*}"

  echo "Processing ${f}"

convert -size 1920x1080 xc:none \
    \( "$f" -crop 440x150+780+450 +repage \) \
    -geometry +780+450 -composite \
    "Eyes/${filename}_eyes.png"

# Nose
convert -size 1920x1080 xc:none \
    \( "$f" -crop 300x160+850+600 +repage \) \
    -geometry +850+600 -composite \
    "Noses/${filename}_nose.png"

# Mouth
convert -size 1920x1080 xc:none \
    \( "$f" -crop 300x130+850+760 +repage \) \
    -geometry +850+760 -composite \
    "Mouths/${filename}_mouth.png"

  # Remove the rectangles from the copy (fill with white)
convert "$f" \
  -alpha on \
  -fill white -draw "rectangle 780,450 1220,600" \
  -fill white -draw "rectangle 850,600 1150,760" \
  -fill white -draw "rectangle 850,760 1150,890" \
    "./Faces/${filename}_face.png"
done
Helping Hands
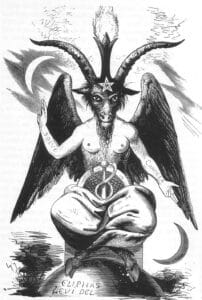
Interpreting the song title further, I aimed to counter the image of Moloch with hands pointing both above and below in the manner of Baphomet, symbolising deliberate human agency acting to transcend the two states. I wanted these hands to look heavily tattooed and witchy, so asked a few inked candidates who unfortunately couldn’t deliver their digits to the cause. At the eleventh hour, I turned to Cambridge-based creative collaborator Helen Richardson who swiftly sourced some suitably pointy nail extensions to work from afar.
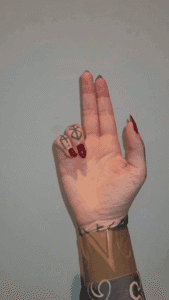
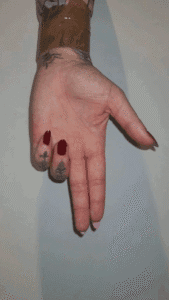
After I suggested wrapping some tape around her wrists to help with editing, Helen filmed her hands slowly turning to the position against a neutral background. After several takes, passing low-resolution previews for speed, we achieved the required framing with clear separation of both hands.
Using the highest-resolution original footage, I isolated the hands in DaVinci Resolve using the ‘Magic Mask’ tool, then composited them with a chroma-key background for both side panels and the central screen. Green Hippo was then used as before to remove the background and apply a halftone filter where required.
Bringing it all together
With the staging and flown truss already set up in Studio 006, we had the morning to set up the video panels, alongside the lighting team’s ground package and audio team’s multicore cabling.
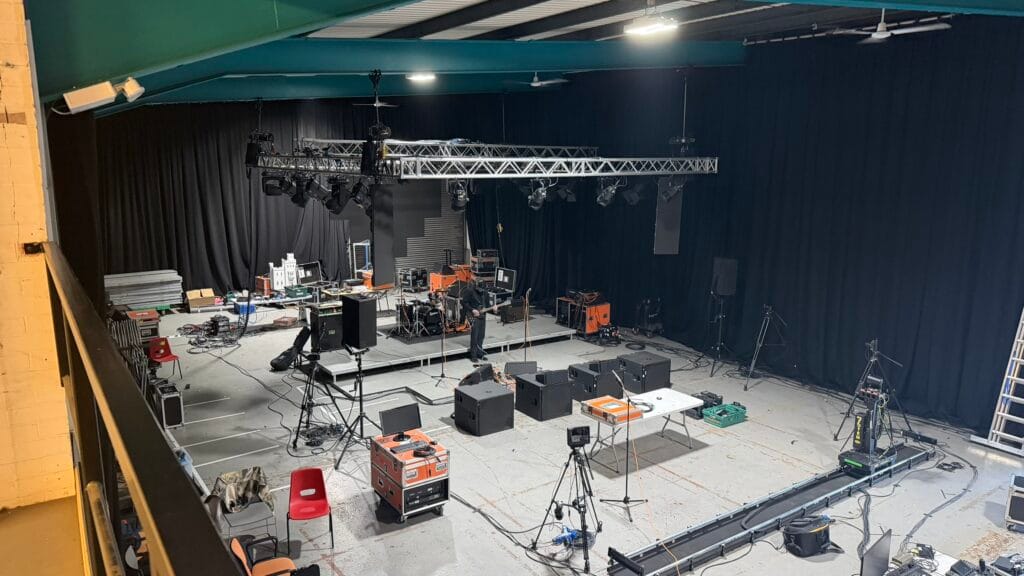
The remaining floor space was taken up by the cameras, operated by the rest of the visuals group as each rotated out to run the media server for their assessment.
Two Blackmagic Pocket Cinema 4K cameras were tripod-mounted closest to the stage, with another two Blackmagic Studio 4K cameras further back. A third Studio camera was mounted at height at the rear of the studio, to capture wide shots of the full stage.
Additionally, a dolly-mounted Panasonic PTZ (Pan, Tilt, Zoom) camera was set up on Tecnopoint rails to shoot across the full length of the stage.
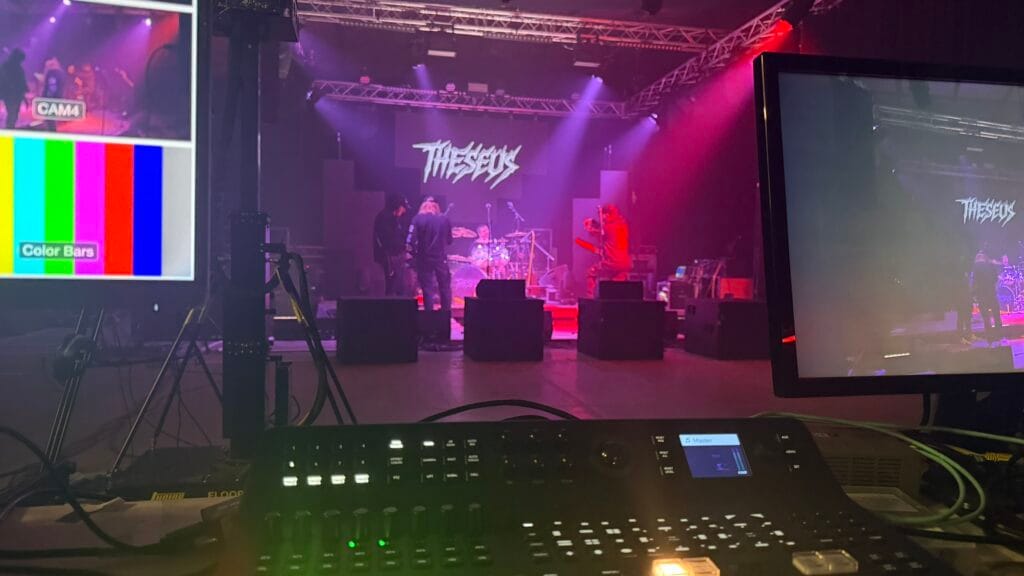
This camera was controlled by a console at Front of House, with all camera signals feeding into an adjacent Blackmagic Atem Television Studio Pro where they were switched and mixed live. This footage was then combined with a live feed from the sound desk and saved on an Atomos Shogun monitor and recorder.
The recordings were subsequently delivered in their multi-gigabyte glory to all students via WeTransfer, to add to our portfolios as we see fit.
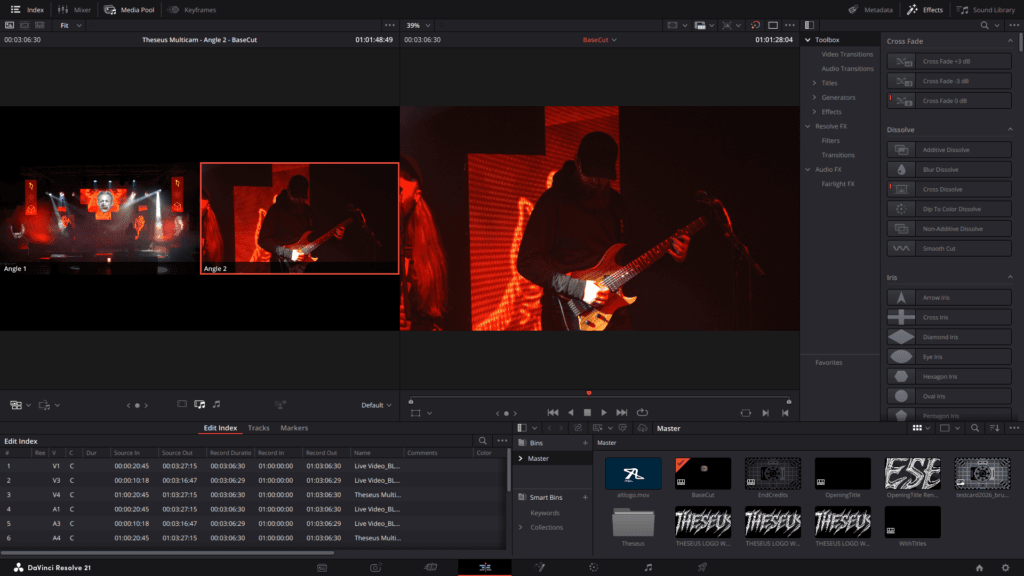
Two full takes were available for this song, along with a few shorter B-shots. I brought them into DaVinci Resolve to mix together as a multicam clip, picking the best shots from each take to fully capture the band’s dynamic. Full credit to the lads for their beat-perfect professionalism, although a few continuity errors leaked in between the takes.
Reflection
Although the design was created with an initial group approved layout in mind, the reality of rigging required a last minute rethink.
With most of the video panels not arriving until late morning, we had to forego the horizontal CB5 strip altogether. For safety and working with the Lighting team’s ground package, the two BP2 stacks flanking the drummer were moved off and behind the stage, requiring extra dummy panels to raise to a visible level.
All ground totems eventually needed reconfiguration, due to lack of available stack supports, feasible data flow, and the requirements of all teams. This was resolved by a subsequent remapping of panels on the Brompton processor and Green Hippo server, while also running out a secondary HDMI cable from Front of House when signal chaining from the NovaStar processor failed.
The new layout caused a problem with an extra top panel on each of the inner stacks, (moved from the outer stacks), where the upper part of the cloud animation bled into the sides. Other elements needed to be reconfigured with slight changes to aspect ratio. Annoying glitches, but nothing to harm artistic intent.
There were also issues when importing the meticulously timecoded Green Hippo project I’d composed outside of the studio. Although the media files and panel mapping were copied without issue, I needed to recreate everything else from scratch while supporting the rest of the group with any technical issues that transpired.
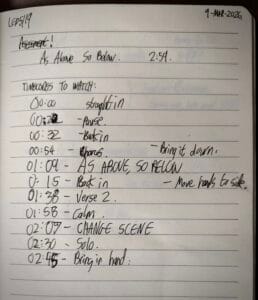
Fortunately, my visuals were the first to be appraised, so I could afford a little extra time to pull it all together for myself and others. Creating multiple mixes in Green Hippo with varying layer counts to blend the different elements, transitioning between them manually in lieu of automation. Even my timecoding was manual, with a hastily scribbled cheatsheet guiding my hands. Given the extra issues, there wasn’t enough time to configure a supplied MIDI controller to physically operate the faders, but mouse and keyboard were sufficient for my needs.
Nonetheless, with my initial efforts working out all the bugs and offering a base configuration to work from, the layout remained stable for the rest of the group to deliver their visuals for subsequent songs.
Overall, a successful assessment was had by all. Not just for my group, but for the lighting and audio teams as well – even if it may have been exhausting for the band by the end of two full days. And if, in the process, we could invoke and banish an ancient deity for the good of the now, then all the better.
LEP-ers together strong!